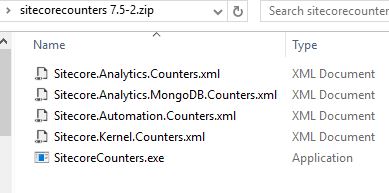
Anton Tishchenko wrote a good quick piece on “stemming” for Solr, and I wanted to build on what he shared.
Solr is generally way underutilized by the Sitecore implementations I’ve seen. It makes for plenty of territory for blogging, though, so maybe bit-by-bit the word will get out about what a powerful distributed system Solr really is.
Let me setup a specific example using Sitecore 9 update-2 with Commerce. I’ll use the CatalogItemsScope Solr core, but you could review most any Solr core with the standard Sitecore schema.
Let me pause here to explain where the default Sitecore Commerce Solr Configuration defines this search index, because it took some digging. In the . . . SIF\Configuration\Commerce\Solr\sitecore-commerce-solr.json file you’ll find:
// The names of the cores to create
“Customers.Name”: “[concat(parameter(‘CorePrefix’), ‘CustomersScope’)]”,
“Orders.Name”: “[concat(parameter(‘CorePrefix’), ‘OrdersScope’)]”,
“CatalogItems.Name”: “[concat(parameter(‘CorePrefix’), ‘CatalogItemsScope’)]”,
Using a fresh IaaS install of Sitecore 9 with Commerce, I’ll go to the Solr admin interface. Select the CatalogItemsScope Solr core from the dropdown list on the left side navigation. Choose the “Analysis” option to access this powerful way of evaluating two key operations one does with Solr: indexing and querying. Solr defines different sets of analyzers for these operations, sort of like how Sitecore exposes the httpRequestBegin pipeline or other extensibility points that projects are always customizing. For this exercise, I’ll focus on the Query operation. The documentation on this Analysis screen has a lot more information on this, if you’re interested.
Enter the search phrase “an AWESOME television!” in the textbox for the Field Value(Query), and then specify the text_general as the Fieldname to Analyse: 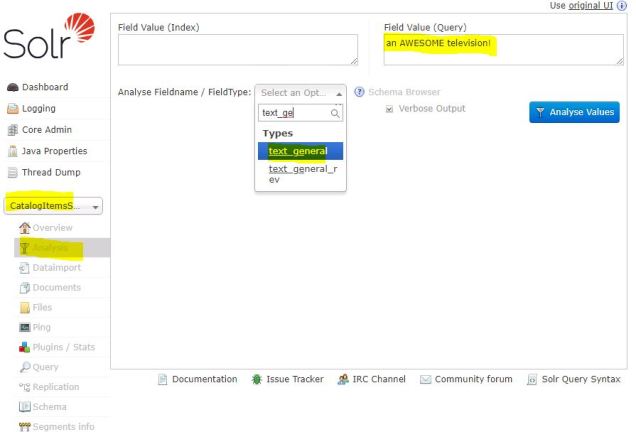
Solr is going to run “an AWESOME television!” through the analysis process and show the results as they progress through each step of that analysis. For this write-up, I’ll uncheck the “Verbose Output” checkbox — but definitely play around with that feature as it shows the offsets and ordinal positions as Solr works it’s magic through each transformation.
After clicking the blue “Analyse Values” button you’ll see output like the following:

Each row of output starts with an abbreviation (ST, SF, etc). That’s the key to which process of the “analyzer” has run; the pipe-separated list to the right of the abbreviation shows the search phrase as it’s progressing through Solr’s transformation logic.
- ST is the StandardTokenizerFactory. I removes the “!” punctuation mark, but otherwise doesn’t make any changes to the search query.
- SF is the StopFilterFactory. This would remove words listed in the CatalogItemsScope\conf\stopwords.txt file. In this case, with an out-of-the-box Sitecore 9 Commerce installation, there are no stopwords specified. This doesn’t change our search query in any way.
- SGF is the SynonymGraphFilterFactory. This component reads a list of synonyms from CatalogItemsScope\conf\synonyms.txt . . . and “television” is one of the samples they provide in that file, so now our query includes those synonyms
- synonyms.txt includes this entry for example purposes:
- Television, Televisions, TV, TVs
- synonyms.txt includes this entry for example purposes:
- The final step, LCF, is to run through LowerCaseFilterFactory which is takes “AWESOME” to “awesome” to ensure case isn’t evaluated in the query.
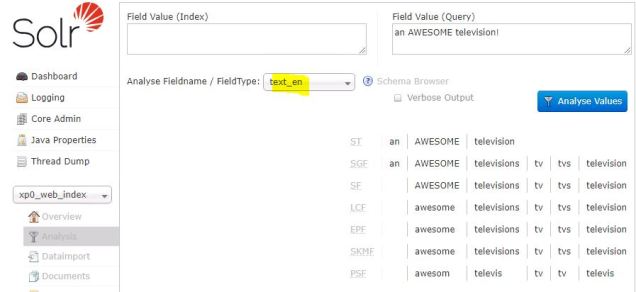
To drive home the point of this example, change the Fieldname to “text_en” from “text_general” and click the blue “Analyse Values” button. The results are different because the text_general and text_en Solr fields have a different set of components defined for the Query operation. Specifically, text_en adds:
- EPF (EnglishPossessiveFilterFactory)
- SKF (KeywordMarkerFilterFactory)
- PSF (PorterStemFilterFactory)
Here’s what the Solr Analysis screen looks like:
There is a lot that could be said about all this, and I’ll probably build on this in a future blog post . . . but I want to return to Anton’s original point about the Porter stemmer and highlight how powerful the Porter stemmer can be. Solr’s text_general is significantly different than text_en, and hopefully I’ve shed light on precisely how they differ on the query side. The docs at http://snowball.tartarus.org/algorithms/porter/stemmer.html review this in some detail. I’ve also used this online Porter stemmer to quickly see how words are decomposed into their key fragments for search relevancy. You don’t really need that online stemming tool, however, since you now see how to use the Solr administrative UI with the standard “text_en” field to have your own Porter stemming sandbox.